Wednesday, April 24, 2013

Card Challenges: no stamps and shapes

Card Challenge: No Stamps


This weeks challenge was to create a card without using stamps. Wow this was harder than I thought it would be! The sentiments I printed off with my printer. I really need to do that more! I usually limit myself with just the sentiments that I have in my stamp collection, but printing them opens things up to unlimited possibilities! I'm making it my personal goal to use my printer more! 

To make the pinwheel on this card I used the small pinwheel die from Lil inker designs, in my big shot. I also used Echo park paper for this card.


Card Challenge: Shaped Cards


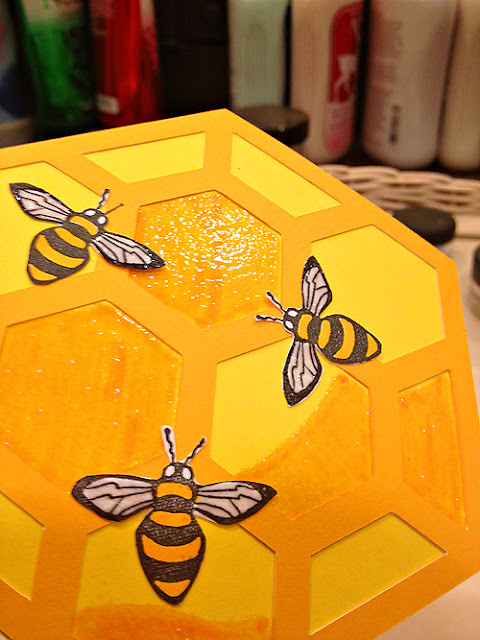
This weeks challenge was to do a shape card. The only rule is that it couldn't be a square or rectangle. For this card I used the shape Hexagonal geometric background, Shape #19760, in the silhouette store.  


I colored some of the cells with markers and then used an embossing pen and clear embossing powder to make it shiny and more like honey. I also clear embossed the bees' wings.


The inside is embossed with a darice embossing folder border and the sentiment is a old retired stamp from stampin up


Pardon the wonky colors on this one! I took a phone pic on my bathroom vanity table before I left the house to deliver it, and the lighting seems to be kinda weird in there for photos. lol! I used "fish in bowl, # 38438" for the bowl, and "fish in bowl, #39243" both in the silhoutte store. I glued cute little googly eyes on the the little fishy :) I had chosen the sentiment "best fishes" for this card.

Tuesday, April 23, 2013

Finally Copics!


I FINALLY jumped on the copic band wagon! I'm so excited! Here's a list of the copics I hand picked to be my starter set. I wanted some of each color family, so I would not be limited on images that I can color, but I didn't want the prepackaged sets either. I wanted colors that I know that I would love, and would be used often. So I researched long and hard. I used both pinterest and google images, looking at other peoples copic projects, and decided what I liked best. Most cards and projects online have the recipe listed of what colors they used to create the image. This was very helpful! I started seeing patterns in the colors that I liked and that made it a lot easier. Once I found a trio I thought I liked, I googled just the copic code numbers, and that brought up images that listed those colors. That pretty much confirmed what I wanted. So here's what I picked for my starter set. (click to enlarge)


If you'll notice, I'm a little short on greens and oranges (yellow reds, YR) and heavier on the yellows. That's because I will use some of the yellows for my green and orange blending combinations. It all evens out. Also, the first set of browns (earthtones, E) are my skin tone blenders. 

Now that I have all these copics, I needed a place to put them! I have found several different ways to store your copics. I knew that I wanted to store them horizontally, and I LOVE homemade storage ideas, so when I was in the hardware store I decided to grab a peice of $8 drain pipe so that  I could have something right away. So here's my current copic storage.....


Wow, my collection looks kinda puny all spread out like that huh. lol! Must buy more copics!!


It was so ridiculously EASY!!! I had the hardware store cut the 12 foot pipe in half (they used a hand saw) so that I could get it into my car easy. Then at home I had my hubby cut them into 5 1/2 inch pieces, and then just glued them together. THATS IT!!! There are plenty of pieces left to add on later too! CHEAP AND EASY, the way I like it! I am going to sit these on a small shelf on my wall right in front of my scrap desk so they will be eye line height. Otherwise I would glue a foam board back on to it. 

Now I did not come up with this idea, I always give credit where credit is due. I found this idea on this blog HERE. So go check out her blog and see how she spray painted hers, not to mention her more impressive copic collection! ;) I will get there!